Using VoIP Features
Evolynx RADIUS can be used for VoIP Authorization and Accounting. Following steps describe how to setup your RADIUS server for VoIP use.
- You will need both Server and Admin programs.
- Make sure your IVR script is not set to overload the acct-session-id. To disable overloading in Cisco IVR, use following command:
no attribute acct-session-id overloaded
1- Configure VoIP features using Controller tool. See VoIP Configuration Settings for more details.
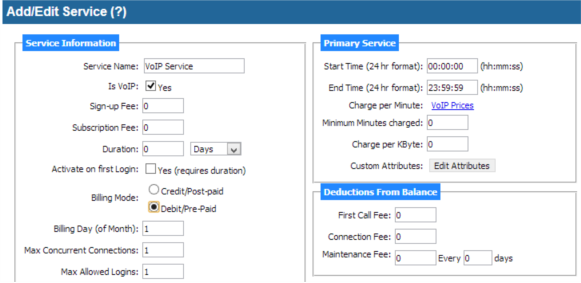
2- In Admin program, define a Service for VoIP. Enter all information as you need. A typical service setting is shown in the following picture:

3- Click on “Save” button before going to next step
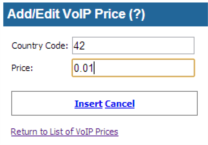
4- To define calling rates for each country code, click on “VoIP Prices” link. A new page pops up which shows a list of “Country Codes” and prices. When you first create a Service, this list will be empty. Click on “Add a new country code” link to add new entries to this list. The following shows the data entry page for new Country_Code/Price:
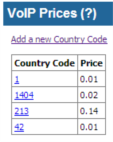
5- After entering prices for some country codes, the “VoIP Prices” page will look like the following picture:
If you need to define different prices for different area codes in a country, simply add separate entries for each area code so the “Country Code” field will show country code followed by the area code.
6- Now you can define a Customer for each Pre-paid card, and assign this service to that customer and add the Card's PIN number as Login ID and Card's serial number as the password.
Note: To simplify data entry for VoIP rates (prices), Evolynx Web Admin lets you create a comma separated text file containing prices and upload it. This file must contain one area code/price combination per line, and area code must be separated from the price by a comma. For example:
1 , 0.05
44 , 0.07
213 , 0.14
There is an upload button on the “VoIP Prices” page which displays a popup, and lets you select a file to upload. Click on “Browse…” button and select the file, then click on “Upload File” button.

